Analyzing the test coverage of smart contracts using Hardhat
In this tutorial, you’ll learn how to profile the test coverage of your smart contracts with Hardhat and the Solidity Coverage community plugin.Objectives
By the end of this tutorial, you should be able to:- Use the Solidity Coverage plugin to analyze the coverage of your test suite
- Increase the coverage of your test suite
Overview
The Solidity Coverage plugin allows you to analyze and visualize the coverage of your smart contracts’ test suite. This enables you to see what portions of your smart contract are being tested and what areas may have been overlooked. It’s an indispensable plugin for developers seeking to fortify their testing practices and ensure robust smart contract functionality.Setting up the Solidity Coverage plugin
The Solidity Coverage plugin is integrated into the Hardhat toolbox package, which is installed by default when you use thenpx hardhat init command.
To install manually, run npm install -D solidity-coverage.
Then, import solidity-coverage in hardhat.config.ts:
coverage becomes available via the npx hardhat coverage command.
My first test coverage
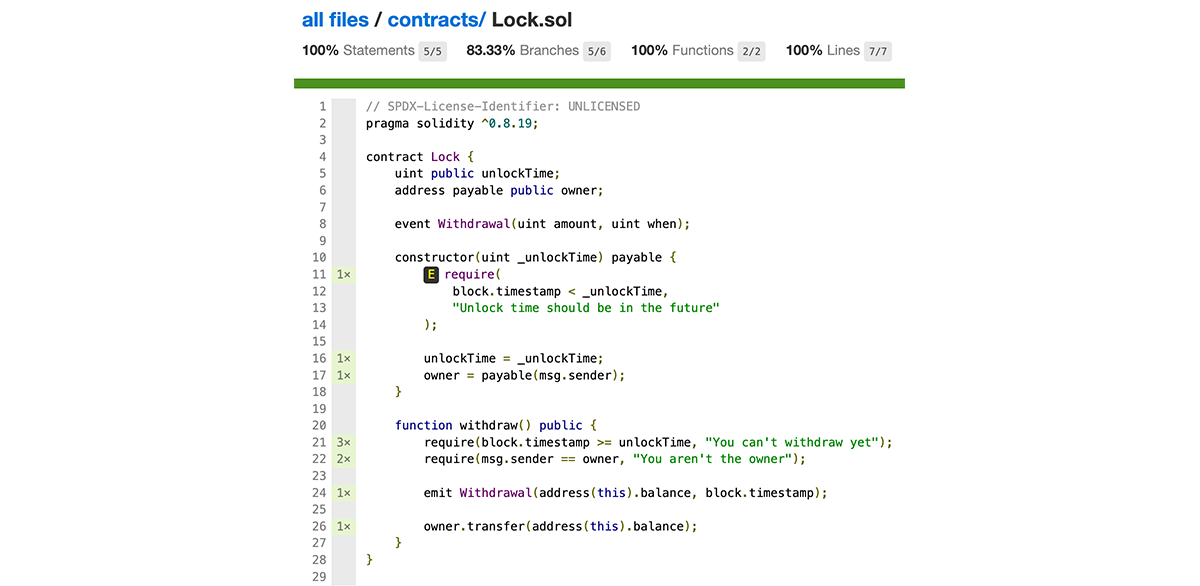
Review the following contract and test suite (You’ll recognize these if you completed the Hardhat testing lesson in our Base Learn series). Contract:Lock.test.ts:
npx hardhat coverage, you should get:
coverage, which was generated by the solidity-coverage plugin. Inside the coverage folder there is a index.html file. Open it in a browser, you’ll see a report similar to the following:
Increasing test coverage
Although the coverage of the previous test suite is almost perfect, there is one missing branch when creating the contract. Because you have not tested the condition that the_unlockTime has to be greater than the block.timestamp:
npx hardhat coverage and you should get: